In this step-by-step guide I show the easiest way to connect WhatsApp to n8n so you can power AI agents and automations that send and receive messages. Follow the instructions below to create the Meta app, configure n8n triggers and actions, and build three practical workflows you can use in production.
Join our AI Automation Mastery Community to download the full n8n workflow templates used in this guide.
Overview
This tutorial covers:
- Prerequisites and account setup in Meta Business Suite and Developer Portal
- How to create credentials required by n8n
- Configuring a WhatsApp message trigger in n8n
- Setting up a send message action for AI agent replies
- Building a human-in-the-loop approval flow over WhatsApp
- Practical use cases and troubleshooting tips
Before you start: prerequisites
Make sure you have the following ready before you begin:
- A Facebook account that can access Meta Business Suite
- A verified Meta business portfolio (required to create WhatsApp apps)
- Access to the Meta developer portal to create an app ID
- An n8n instance where you can add credentials and workflows
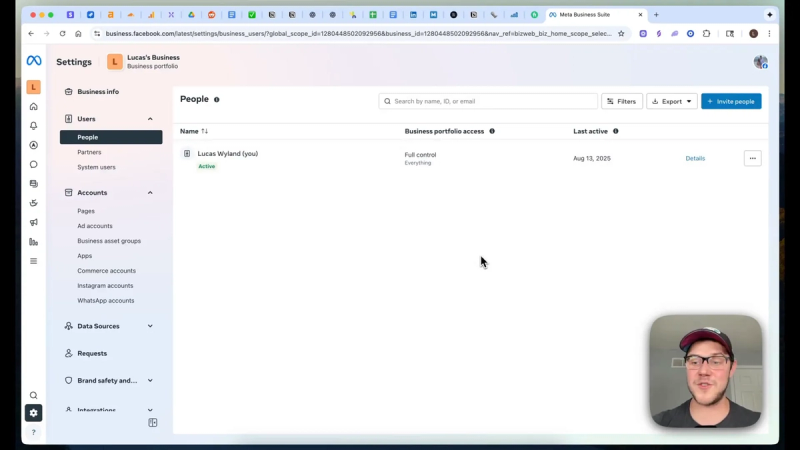
If you are building this for a client, ask them to invite you to their business portfolio under the Users section so you can create the WhatsApp app for them.
Step 1: Create the Meta WhatsApp App and obtain credentials
Start by creating an app inside the Meta developer portal and enable WhatsApp. The two values n8n needs to authenticate are the App ID and the App Secret. Follow these steps:
- Open Meta Business Suite and confirm your business portfolio is created and verified. Meta may require a phone number or a credit card for verification.
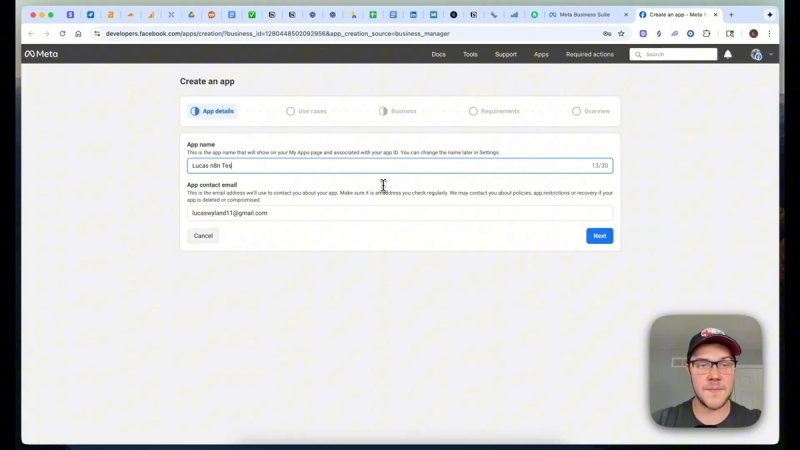
- In Business settings, go to Accounts → Apps and click Add to create a new app ID. Choose the Business app type when prompted. This cannot be changed later.
- After the app is created, click Setup WhatsApp. Open App Settings → Basic and copy the App ID and click show on App Secret to copy the secret.
Paste the App ID into n8n’s credential field labeled Client ID, and paste the App Secret into Client Secret. Save and test the connection in n8n until you see a successful status.
Step 2: Generate an access token and whitelist test numbers
To receive messages in test mode and to send messages back you need a long-lived access token and the WhatsApp Business Account ID. In the developer portal, navigate to the WhatsApp API setup and select Generate Access Token. Complete the authorization flow and copy the returned token.
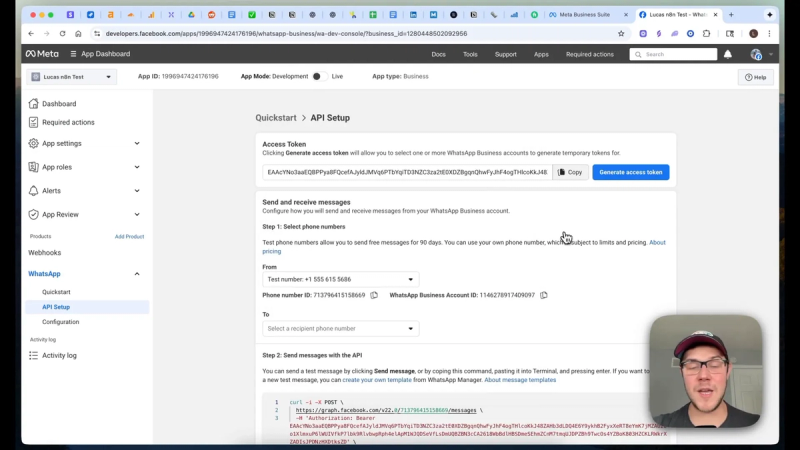
Also copy the WhatsApp Business Account ID from the same page and store it in the n8n credential that asks for the Access Token and Business Account ID.
For test mode send and receive, whitelist the phone number you will use for testing. Under API setup → Manage phone numbers, add your phone number with the correct country code. Refresh the list in the portal so n8n can access the test phone number.
Step 3: Configure the WhatsApp trigger in n8n
With the credentials in place you can add a WhatsApp Business Cloud trigger node in n8n. Use the On Message trigger to listen for incoming WhatsApp messages. Key configuration points:
- Select the WhatsApp Business Cloud credential that contains the App ID and App Secret.
- Enable execute workflow in test mode to create a temporary listener while you validate the integration.
- Map the incoming JSON to extract the text body you want to forward into an AI workflow. Typically the path is JSON → messages[0] → text → body.

Once configured, the listener will populate the incoming message JSON into the workflow. From there you can pass the text into an LLM chain, an agent, or other processing nodes.
Step 4: Send replies: set up the Send Message action
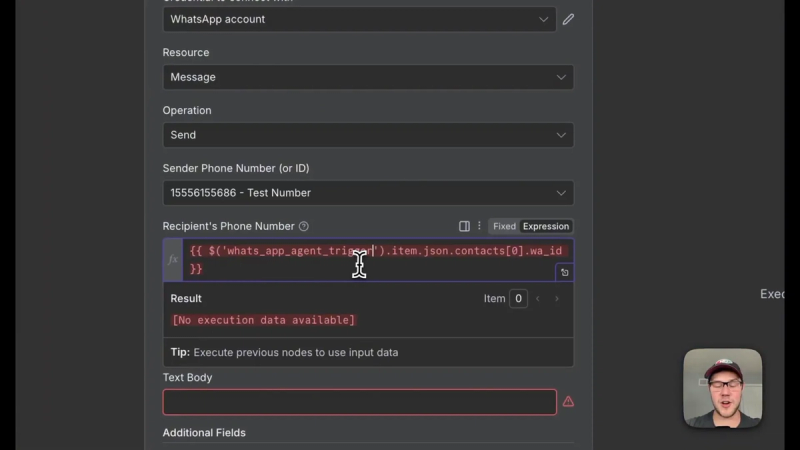
To respond to senders automatically you need the send message action node. Add the WhatsApp Send Message action and configure these fields:
- Sender phone number or ID: Select the test phone number that appears in n8n.
- Recipients phone number: Use an expression that reads the sender ID from the trigger output. This value is usually under the trigger node JSON in contacts[0].wa_id.
- Text body: Populate this from your AI agent output. Use JSON.stringify or map the specific response field you want to send.
Note: When in test mode you must whitelist the recipient number. If you do not whitelist the number, the send operation will fail.
Step 5: Build an AI agent reply flow
With the trigger and send action connected you can route the incoming message into an AI agent node. Typical flow:
- Trigger receives WhatsApp message and extracts the text.
- Pass the text into an AI agent or LLM chain that generates a reply or performs tasks.
- Format the agent output and set it as the message body for the send action.
- Send the reply back to the original sender using the wa_id from the trigger.
This simple loop lets you create chatbots, Q&A assistants, and information lookup services that operate inside WhatsApp.
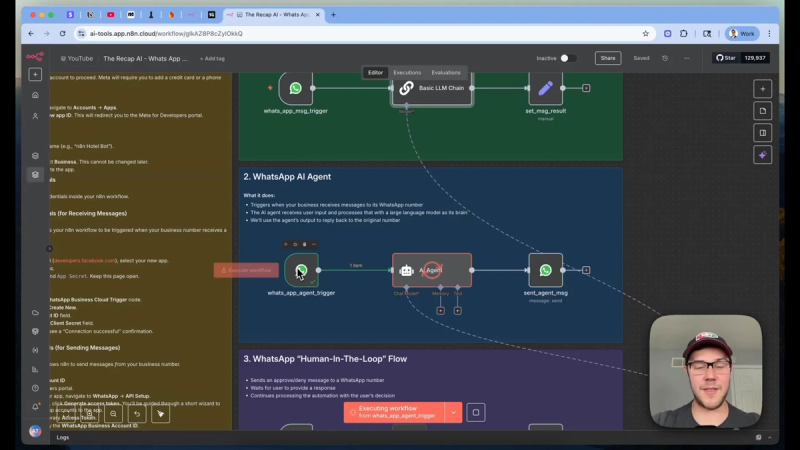
Step 6: Human in the loop approval over WhatsApp
Sometimes AI should not act without human oversight. Use n8n’s approval node to pause a workflow and wait for a human response via WhatsApp. This pattern is ideal for content review, publishing workflows, and high-value communications.
Core steps:
- Add a node that sends a message and waits for approval. Set the response type to Approval or Free Text depending on the feedback style you need.
- Set recipient to your reviewer's phone number or a channel that routes to a reviewer group.
- When the approval arrives, the node returns a field such as approved with true or false. Use an If node to branch the workflow based on that value.

Three practical use cases
1. Customer support triage
Use WhatsApp as the first contact point. The trigger captures the customer message and an AI agent classifies intent and pulls account data. For common requests, the agent replies automatically. For complex issues, route to human support with an approval step so the human can review suggested responses before sending.
2. Content review for social posts or newsletters
Generate drafts via AI then send each draft to a human reviewer on WhatsApp. The reviewer can approve, reject, or send detailed feedback. On approval the system publishes or schedules the content. On rejection the system updates the prompt with reviewer feedback and regenerates the draft.
3. Lead qualification and scheduling
Use WhatsApp to capture lead details. An agent asks qualifying questions and passes high-quality leads to sales. For sensitive handoffs, use a human-in-the-loop approval so sales can confirm and then schedule meetings using an integrated calendar action.
Troubleshooting and tips
- If the credential test fails, confirm the App ID and App Secret are correct and that the Meta business portfolio is verified.
- Always copy the long-lived access token from the WhatsApp API setup page and store it in the n8n credential.
- Whitelist test phone numbers when using test mode. Forgetting to whitelist leads to failed send attempts.
- Use expressions to dynamically set the recipient from the trigger output. This keeps responses tied to the original sender.
- Log the full incoming JSON during testing to identify where text, contacts, and wa_id values reside.
If you plan to scale, move from test numbers to a production phone number and review Meta’s messaging policies and quotas.
Wrap up
Connecting WhatsApp to n8n unlocks powerful automation patterns for chatbots, AI agents, and human review workflows. The integration requires a few keys from the Meta developer portal, plus careful credential and whitelist management. Once set up you can route incoming WhatsApp messages into AI agents, reply automatically, and include human approvals when required.
Join AI Automation Mastery to download the full n8n workflow templates, prompts, and step-by-step JSON exports that match this guide. Use the templates to start building faster and customize them for your business needs.


